Online tiple and bandola lessons: learn Colombian Andean music from anywhere
You can learn tiple and bandola by video call, from another city or another country. Here's how a lesson works, what equipment you need, and what to practice in the first month.
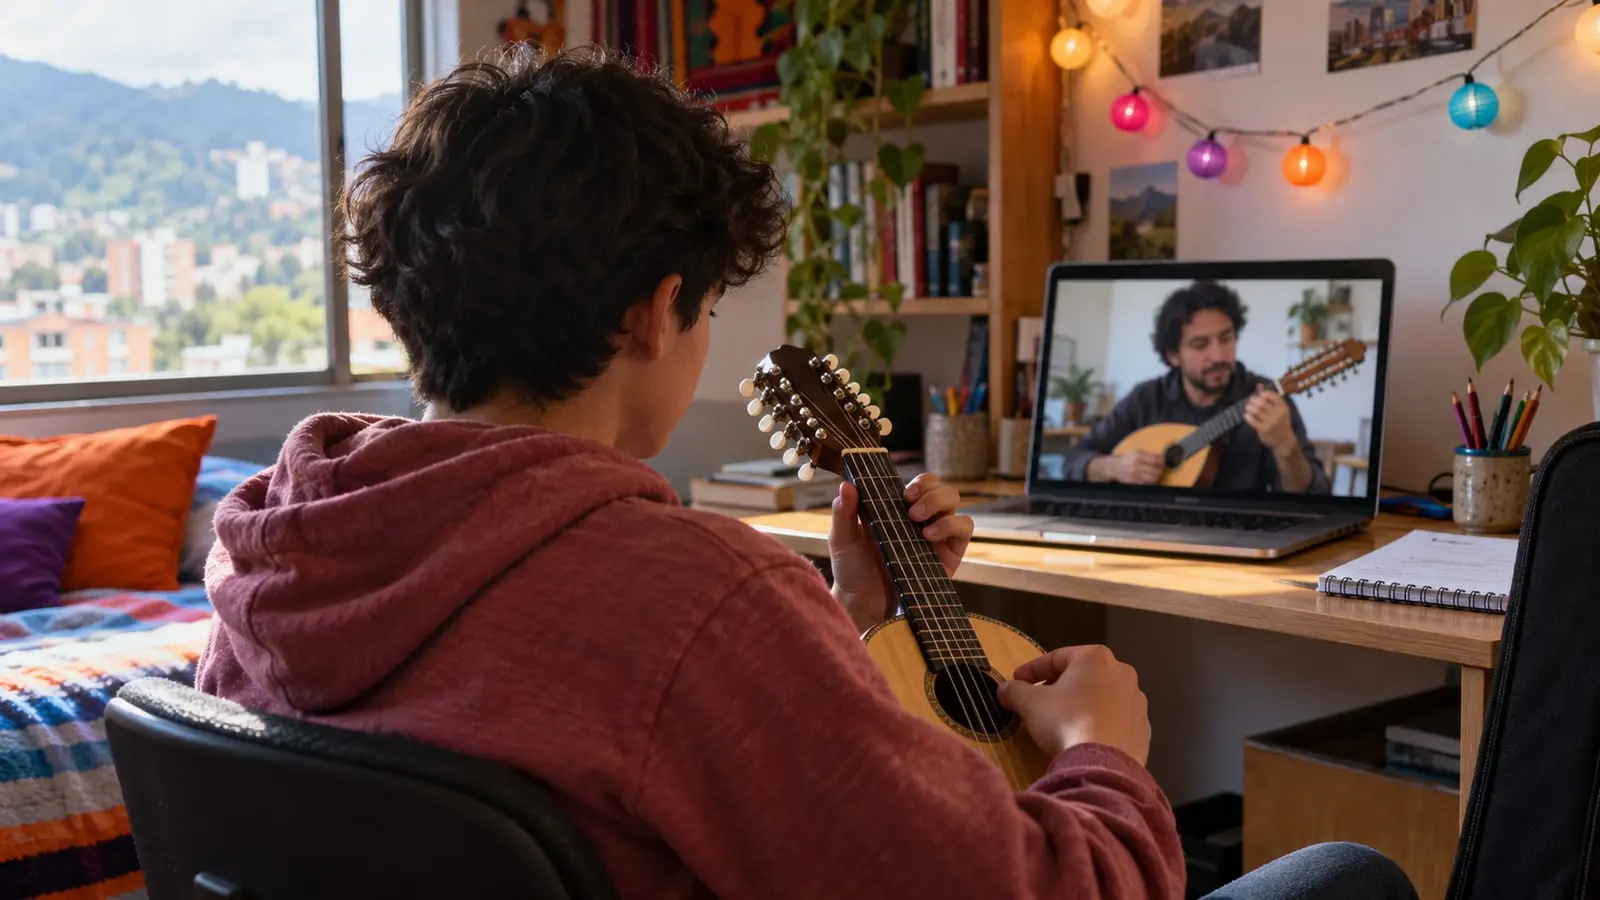
Yes, you can learn tiple and bandola very effectively by video call, with a live teacher who can see your hands, hear your instrument, and correct you on the spot. You don't need much: your instrument, a stable connection, and a camera angle that shows your right hand. With that, an online music lesson can cover tuning, rhythms, reading music, and repertoire, just like an in-person lesson.
This is especially helpful if you live far from a city with an Andean music tradition: Colombians in Barranquilla, Leticia, or Madrid who want to reconnect with the music of home, or people from other countries curious about bambuco. Here we explain what an online tiple or Andean bandola lesson is like, how to set up your camera, how to tune remotely, and what to practice during the first month.
In short
- An online tiple or bandola lesson is live: your teacher sees your hands, hears your instrument, and corrects you in real time.
- The camera should show your right hand and the bridge; placing your phone or computer to one side at chest height works better than directly in front of you.
- Connection delays almost always make playing at the same time as your teacher impossible. Instead, you take turns: they play, you copy, and you work with a metronome.
- Tune before joining with the tiple or Andean bandola tuner; use lesson time for listening rather than tightening strings.
- The first month focuses on posture, tuning, a steady beat, and a basic strumming pattern in 3/4 and 6/8 for pasillo and bambuco.
What an online tiple or bandola lesson is like
You join your teacher by video call at the agreed time. The lesson lasts as long as you have arranged and follows a structure similar to an in-person lesson: warm-up and tuning, review, new material, and a specific assignment for the week. The format changes, but the method stays the same.
- Tuning and warm-up. You arrive with your instrument tuned, and your teacher checks by ear whether any course has gone out of tune. Then you spend a few minutes on right- and left-hand exercises.
- Review. You play what you practiced. Your teacher listens, asks you to repeat a passage, and points out what to improve: a stroke, a chord change, or your pulse.
- New material. A rhythm, a passage, or a piece. Your teacher plays it slowly on camera, and you repeat it.
- Wrap-up and practice assignment. You leave with two or three clear points to practice and an idea of how much time to spend on them. Many teachers send a recording of the pattern by message for reference.
One benefit few people expect: at home, your instrument, music stand, and metronome are within reach, and you can record your practice to listen back later. For the minimum recommended setup, read what equipment you need for online music lessons.
Camera and audio: what really makes a difference for tiple and bandola
On tiple and bandola, almost all the sound starts in the right hand: strumming, muting, and tremolo with a pick happen in a small area of the instrument. If the camera only shows your face, your teacher has to guess. These positions work well:
| Situation | Recommended placement | What is visible |
|---|---|---|
| First lessons, posture, and grip | One to one and a half meters in front of you, at chest height | Full body, instrument position, both hands |
| Tiple strumming patterns | Phone to one side (the right if you are right-handed), aimed at the bridge and right hand | How your fingers strike and where you mute the strings |
| Bandola picking and tremolo | Camera above or to one side, near the bridge | Pick angle, wrist movement |
| Left hand and chords | Front-facing camera angled slightly toward the neck | Finger placement and chord changes |
If you have two devices, join the lesson on both: one in front and one to the side. If you only have one, ask your teacher to tell you when to move the camera; it takes seconds and is worth it.
About audio
- Metal strings sound bright and can overload the audio. If your teacher's voice sounds clear but your tiple sounds tinny, play more softly or move it a little farther from the microphone.
- Check your video call's audio settings. Many platforms filter out sounds other than human speech and cut off the instrument's sound. Look for “original audio” or “music mode” options; our equipment article explains how to find them.
- Headphones for listening to your teacher. They prevent echo and let you hear the nuances of what your teacher plays.
- A small room with no background noise. Even curtains or a nearby bed can improve the sound.
Tuning remotely: your first skill
With so many strings, tiple and bandola go out of tune with changes in weather, transport, and use. Over a video call, your teacher cannot turn your tuning pegs, so learning to tune is one of the first things you practice. Two free tools on our website can help:
- Tiple tuner: four courses tuned to D, G, B, and E, with the middle octave strings listed separately so you can tune them individually. For a step-by-step guide, read how to tune the tiple.
- Andean bandola tuner: six courses tuned in fourths, from high to low, to G, D, A, E, B, and F♯ in the most common tuning. All strings in the same course sound in unison.
Tune before joining, and if something sounds off during the lesson, your teacher will tell you which course to check. Over time, your ear will learn to notice when an adjustment is needed. String setups and tunings vary slightly between instruments and schools, so confirm the tuning you will use with your teacher.
What you need to get started
| Element | Why it matters | Alternative if you don't have it |
|---|---|---|
| A tiple or bandola in good condition | An instrument with strings set too high or a poor setup can be discouraging. Check the string height, bridge, and condition of the strings | Ask your teacher to help you choose; also see how to choose a tiple or bandola |
| Phone, tablet, or computer with a camera | So your teacher can see and hear you | A phone works; a stand or tripod helps a lot |
| Stable internet connection | Even a brief connection drop interrupts the lesson | Use a wired connection for your computer if you can |
| Headphones | They reduce echo and improve what you hear | Your phone's earbuds are fine to start with |
| Music stand or somewhere to place your sheet music | To read without hunching over | A table and a sturdy chair |
| Tuner | To arrive at your lesson with your instrument ready | The free tuner on our website |
| A pick (for bandola) | Your teacher will suggest a thickness and shape to start with | You can ask for a recommendation before buying one |
About your chair: choose one without armrests, where the instrument rests comfortably on your leg and your right forearm can move freely. If you play guitar, tiple posture is similar; bandola posture, with a pick, is a different matter that your teacher will demonstrate up close.
Plan for the first month
Every student progresses at their own pace, and your teacher will adapt everything to your level and goals, but this is a realistic sequence for starting with bambuco and pasillo:
| Week | Tiple | Bandola |
|---|---|---|
| 1 | Posture, grip, and tuning. Keeping time with a metronome. First simple left-hand chords | Posture, pick grip, and tuning. Open strings with alternating downstrokes and upstrokes |
| 2 | Basic strumming pattern in 3/4 for pasillo and right-hand muting practice | G or C major scale in one position, with alternate picking and a steady beat |
| 3 | Basic bambuco strumming pattern, combining 3/4 and 6/8. Changes between two or three chords | First tremolo exercises on long notes, keeping the wrist relaxed. A short three- or four-note melody |
| 4 | Accompany a familiar song with two or three chords, recording it to review in class | A simple pasillo or bambuco melody, played slowly with a metronome |
Bambuco is a style with a feel in both three and two, so the first step is to listen to it often and play it slowly. Colombian rhythms: bambuco, pasillo, and cumbia explained explains the difference between the two styles, and time signatures explained explains why 3/4 and 6/8 overlap.
When choosing pieces, start with familiar songs and play slowly; “Pueblito viejo,” a waltz many Colombians know by heart, is a common choice for accompaniment with just a few chords. Find more ideas in Colombian songs to learn on tiple or guitar.
How to practice between lessons
- A little every day. Fifteen or twenty minutes a day goes further than an hour on Sunday, especially with metal strings that put your fingers to work.
- Always use a metronome. In bambuco and pasillo, the pulse is what gives the music its Colombian feel. Start slowly, even if you think you could go faster.
- Record yourself. Sending your teacher a phone recording of your practice lets them see or hear what they missed live.
- Listen often. Play recordings of trios, duos, and estudiantinas while you do other things. Your ear picks up the phrasing without you noticing.
- Take care of your hands. Warm up, stretch, and stop if you feel pain. Sore fingertips at first are normal; if your wrists hurt, tell your teacher.
If ear skills are a challenge, the ear training tool lets you work on intervals and notes on your own. And if you play guitar, your guitar lessons and tiple lessons reinforce each other because they share chords and the tuning of the first four strings.
How an A medio tono teacher supports you
Every A medio tono teacher is assessed on musicianship, teaching skills, and personal qualities before teaching their first lesson. In a tiple or bandola lesson, that means someone who can explain a strumming pattern, correct tense tremolo technique, and choose repertoire to suit your level and tastes.
- Wherever you live. You can take online lessons from any city in Colombia or from abroad; you just need to coordinate across time zones.
- At your own pace. Whether you want to accompany family sing-alongs, prepare for a competition, or learn to read music, the plan adapts to you.
- In-person option. If you are in Bogotá or the surrounding area, you can also take in-home music lessons, depending on each teacher's availability. To find the format that suits you, see in-home or online music lessons.
To get started, message us on WhatsApp with your instrument, level, and preferred schedule, and we will help you find the right teacher.
Frequently asked questions
Can I learn tiple entirely through online lessons?
Yes. With a live teacher who can see your hands, hear your instrument, and correct you, online learning works well for tiple and bandola. Make sure the camera shows your right hand, and practice with a metronome between lessons.
Do I need to know music or read sheet music to start?
No. Tiple starts with rhythms and chords, and bandola with picking technique and simple melodies. You can learn to read music alongside these skills, and it is very useful if you later want to play in an estudiantina.
What if I don't have a tiple or bandola yet?
Check with your teacher before buying. It is worth checking the string height, bridge, and condition of the instrument. Our guide to choosing a tiple or bandola explains what to look for.
Can I take lessons from another country?
Yes. You can take online lessons from any city in Colombia or from abroad. You just need to agree on a schedule that accounts for time zone differences and have a good connection.
Which is better to start with, tiple or bandola?
It depends on which role appeals to you: the tiple provides accompaniment and rhythm, while the bandola carries the melody. If you already play guitar, the tiple will feel more familiar. You can discuss it with your teacher in your first lesson.
Sources
We checked the facts in this article against these sources on October 22, 2026.